


Important: Before you begin this process, we recommend emptying your Spam Folder and Deleted Items folder to avoid exporting any undesirable or unnecessary emails. This step will help protect your computer from malware and save hard drive space.
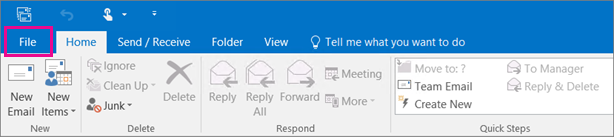
- At the top of your Outlook ribbon, choose File.
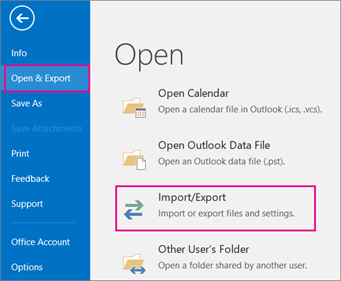
- Choose Open & Export > Import/Export.
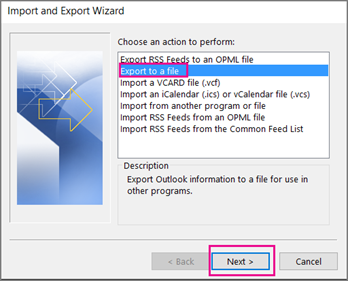
- Choose Export to a file.
- Click Outlook Data File (.pst)> Next.
- Select the name of the email account to export, as shown in the picture below. Only information for one account can be exported at a time.
Make sure that the Include subfolders check box is selected. This ensures that everything in the account will be exported: Calendar, Contacts, and Inbox. Choose Next.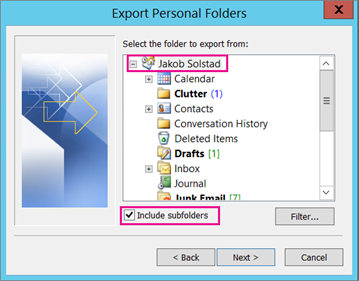
- Click Browse to select where to save the Outlook Data File (.pst). Enter a file name, and choose OK to continue.
Note: If you’ve used export before, the previous folder location and file name appear. Type a different file name before choosing OK. - When the Create Outlook Data File dialog box appears, click OK.
- Choose Finish.
- Outlook should begin the export within a few seconds.
We recommend leaving the mouse and keyboard alone during the export process, as the export could be interrupted by further user interactions, resulting in loss of data.
The export process could take from a few seconds to a few hours depending on your mailbox size, the power of your computer and your internet speed.
